I though some of you might like to see some of the projects I do, this is my most recent one.
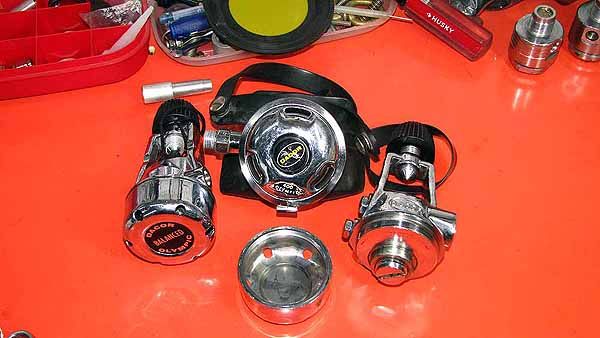
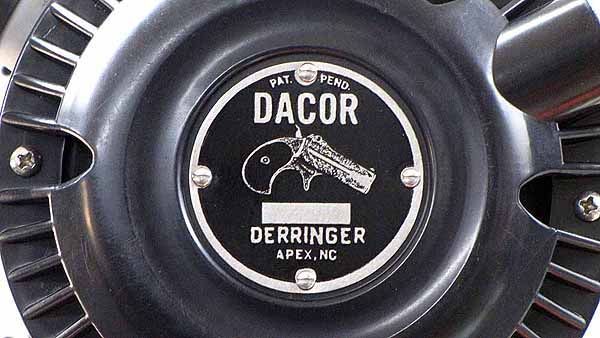
The Dacor Olympic 400 and 800 series of regulators were sold for a good number of years but in the modern era do not have any following for a multitude of reasons. They are fairly large, heavy and parts kits have not been available for quite some time so they have little value. On the up side for me, the internal parts are for the most part common ones and I had purchased a lot of old parts a while back which contained a bunch of service kits for the regs. Seeing them go for less than $10 at times on eBay I wondered if something useful could be done with them. I figured the worst I could do was to destroy an inexpensive regulator…and one did end up sacrificed to finish the project. Next I needed a name for the project. I wanted something that sounded good with Dacor and since it was obviously going to become a double hose a name that reflected that seemed in order. Since a double hose has 2 hoses…. 2 barrels if you will, the little 2 barreled derringer gun came to mind. Derringer seemed like a good name, and so the name Dacor Derringer was chosen.
In outward appearance the Olympic 400/800 regs look a lot like the Voit Titans. I had experience with converting the Titans from a single hose to a double hose design when I worked on Luis’s Pegasus project so I thought I might be able to do the same with the Dacor. The Voit Titan is single hose regulator but Voit had multipurposed the main body such that it could be used as either a Titan single hose or a Trieste double hose with the addition of a second stage and a set of cans. The LP seat was already machined into the body and threaded so it was a relatively simple job to convert the body to a double hose, once the second stage was designed and built. The Dacor was not so simple. Dacor never intended the body to be used as a double hose so there were no provisions made for a second stage but looking at the reg I felt there was enough room to add a second stage- there is barely enough room as I soon found out.
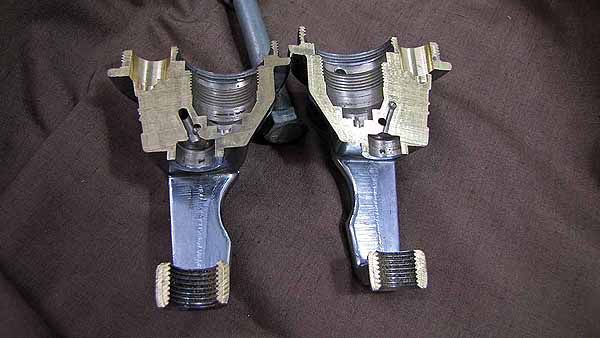
To make a double hose out of the Olympic, I would need 3 things, a LP port to mount a second stage in, the second stage itself and a set of cans. The cans were easy since the diameter of the main body of the Olympic was the same as the Voit so the same cans that were used on the Pegasus would work on the Dacor. I took some measurements, clamped a body into the mill and drilled away…not the best approach in retrospect. On my first attempt to create a LP port I miss judged the depth of my cut and preceded to bore all the way through the body making it useless but not to destroy the reg in vain, I sawed it in half so I could better see what I was dealing with, turns out there is room but not much. The hole in the upper corners of the reg cut in half were my first attempt at a port.
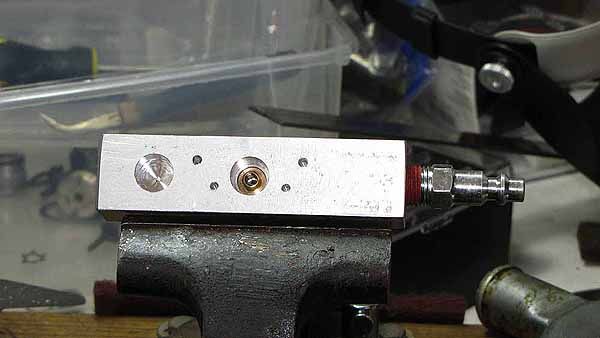
With a better idea of the space I had to deal with, I decided to make a regulator mock up to experiment on before risking the life of another reg, a scrap piece of aluminum with the necessary holes drilled, bored and tapped became my test jig. For initial testing I connected it to my air compressor so I would have an unlimited supply of air to work with. I was not going to be breathing off of it during the initial testing and it could be easily washed before actual breathing test so shop compressor air was not a problem to use. After some measurements to determine how much space I had to work with and doing my first design for the LP seat I machined the port into the aluminum block and turned a LP seat from brass. It became apparent that screwing the second stage into the reg like is done on both the Voits and US Divers regs was not going to work, there was not enough depth to install a LP seat and the second stage so an alternative way of mounting the stage was needed. As it turned out, the alternative mounting had the extra benefit. Because the second stage body had to be a good bit larger to provide space for the mounting screws, it allow me to move my venturi port much closer to the can horn and to add some venturi controls. This made a very effective and controllable venturi.
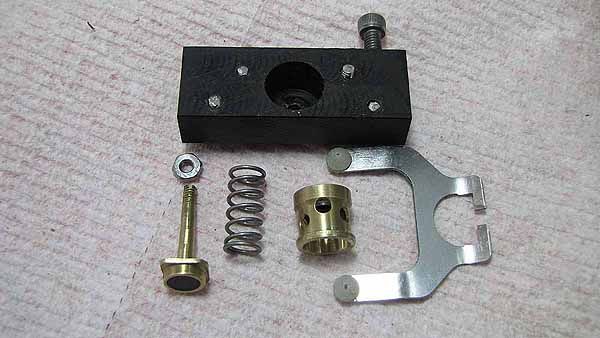
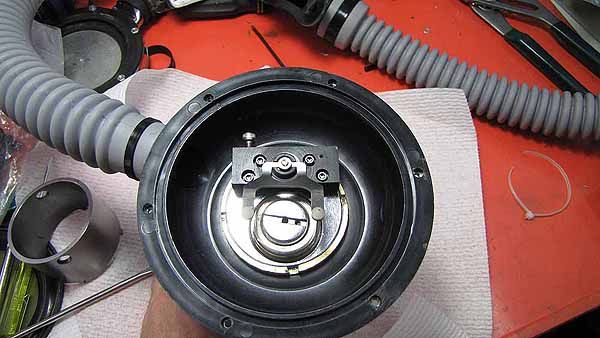
With the test jig completed and the LP seat installed, it was time to move to the second stage itself. I decided to make as much of it as I could, after all,one of the big reasons I did this was just to prove to myself I could. Besides hardware, the only part of the second stage I did not make was the lever, it was borrowed from the HPR, another project I had been involved with. The second stage consists of 3 major parts, the main body, the body bushing and the LP seat holder. I chose delrin for the main body for a couple of reasons. It’s tough, very easy to machine and not as expensive as brass, besides I like machining delrin. The body bushing is made of brass and serves as reinforcement to the delrin but it’s main purpose was to be a simple piece I could make quickly and/or adjust easily. I don’t claim to be a math or mechanical genius so trial and error are more my mode of operation. I knew that I was going to have to play with the dimensions in the spring chamber to get the correct spring tension for the proper cracking pressure. Unlike a nozzle that is screwed in, I had no way of adjusting spring tension on the fly so I had to design in a part that I could trim as needed. The bushing allowed me to quickly remove it and remove material until I got the spring tension right.
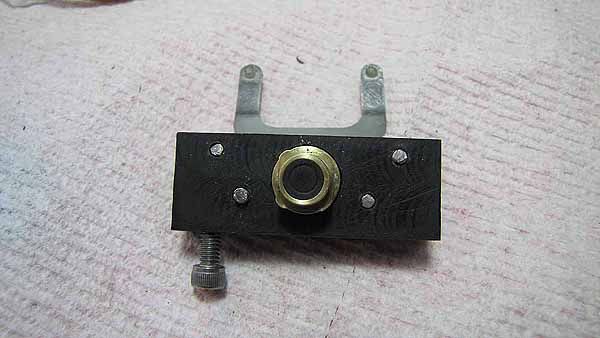
The next feature of the second stage is it’s adjustable venturi. Again, calculating the needed flow and orifice sizes is not my strong suit so I opted for a more mechanical approach, an adjustable flow, besides, I wanted a way to vary the venturi response. I prefer a stronger venturi but others don’t so I made a simple way to control the flow. The screw in the side of the body is turned to control the flow.
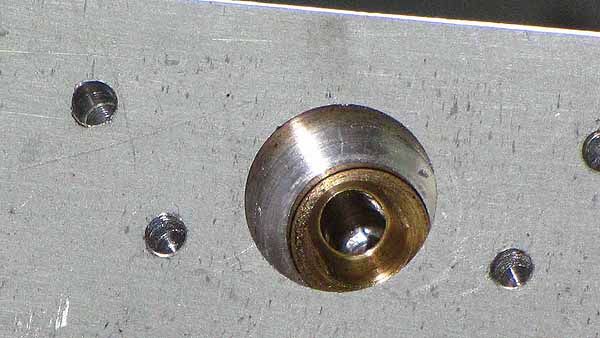
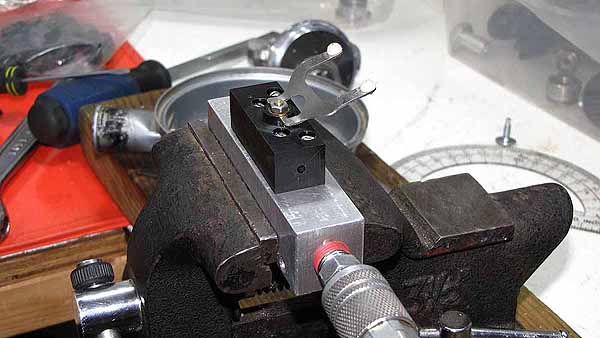
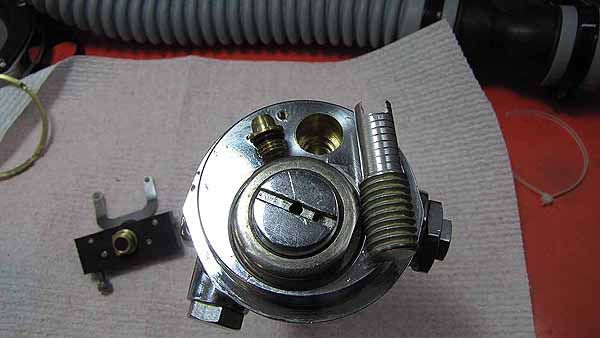
Once I had the port design, LP orifice design and the second stage completed, it was time to move on to machining the main body. The port had to be drilled, an air passage had to be drilled from the IP chamber to the new second stage port, the necessary counter bores had to be machined and the port threaded to accept the LP seat. This was the most difficult part of the job because one mistake here and the entire reg became scrap….like the first one. The test jig helped here as well since I had already performed the same machining operations on it. The item on the right is an installation tool for the LP seat. If you look closely at the LP seat in some of the photos you will see it has 2 flats that allow the installation tool to be used.
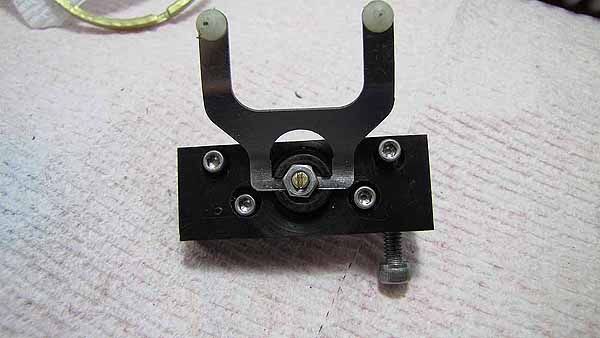
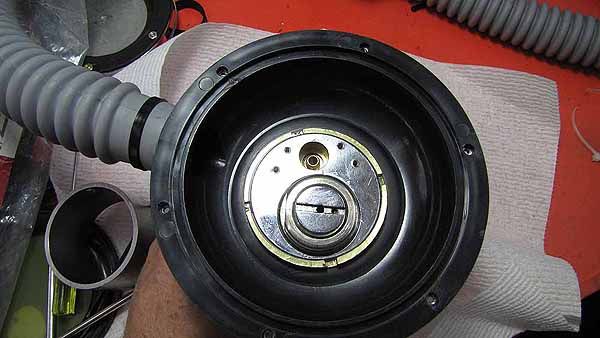
Once the port was completed and the second stage built it was time to install the reg into a new set of cans. I chose to use Robs reproduction cans, both because they are easy to machine and I have a hard time destroying old cans, Rob can always make more repros but more original cans are not going to be made. The body ring was made by cutting excess material off the end cap of the 400 and adding slots for a ring tool. The addition of a HPR lever with a new upgraded diaphragm and the reg was ready to test. The second stage proved to work nicely. If flows plenty of air, the venturi can be adjusted from none to overly aggressive and the cracking pressure is close to 0.5 IWC. I liked the way it looks as well.
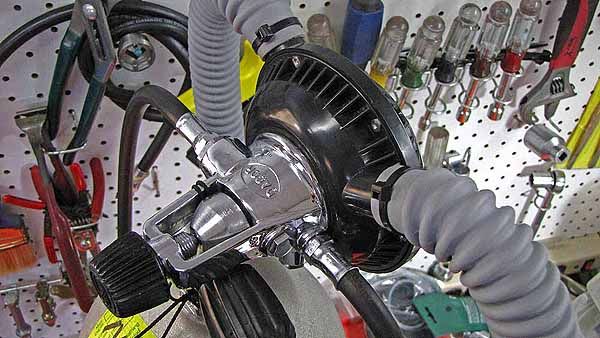
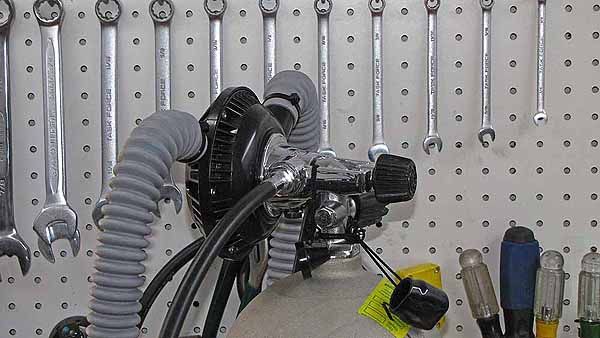
Finally, the reg need to be dressed up to go diving. I added a Dacor Pacer XL second stage, a Dacor SPG, a set Voit gray hoses and black mouthpiece from the Scuba Museum. The finishing touch was the really nice label that Doc Ed and Allan produced for me.
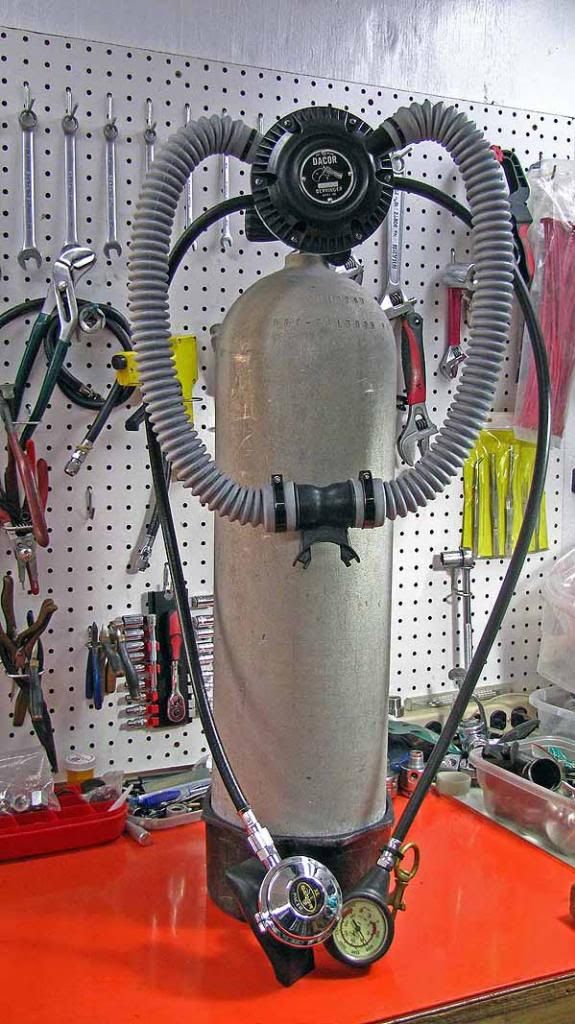
The reg has been pool tested and it worked very well....some open water students got to see the first bubbles come from this new reg. It will make it's open water debute at Sand Dog next weekend (for those of you who do not know, Sand Dog is an annual meeting of vintage divers hosted by Vintage Double Hose). This was a fun project to do. Thanks to Luis, Allan and Ed for assisting me with the project. There are more photos in Photobucket and I can add more is anyone would like to see more of the machining process. Hope you guys like reading about my projects.
The Dacor Olympic 400 and 800 series of regulators were sold for a good number of years but in the modern era do not have any following for a multitude of reasons. They are fairly large, heavy and parts kits have not been available for quite some time so they have little value. On the up side for me, the internal parts are for the most part common ones and I had purchased a lot of old parts a while back which contained a bunch of service kits for the regs. Seeing them go for less than $10 at times on eBay I wondered if something useful could be done with them. I figured the worst I could do was to destroy an inexpensive regulator…and one did end up sacrificed to finish the project. Next I needed a name for the project. I wanted something that sounded good with Dacor and since it was obviously going to become a double hose a name that reflected that seemed in order. Since a double hose has 2 hoses…. 2 barrels if you will, the little 2 barreled derringer gun came to mind. Derringer seemed like a good name, and so the name Dacor Derringer was chosen.
In outward appearance the Olympic 400/800 regs look a lot like the Voit Titans. I had experience with converting the Titans from a single hose to a double hose design when I worked on Luis’s Pegasus project so I thought I might be able to do the same with the Dacor. The Voit Titan is single hose regulator but Voit had multipurposed the main body such that it could be used as either a Titan single hose or a Trieste double hose with the addition of a second stage and a set of cans. The LP seat was already machined into the body and threaded so it was a relatively simple job to convert the body to a double hose, once the second stage was designed and built. The Dacor was not so simple. Dacor never intended the body to be used as a double hose so there were no provisions made for a second stage but looking at the reg I felt there was enough room to add a second stage- there is barely enough room as I soon found out.
To make a double hose out of the Olympic, I would need 3 things, a LP port to mount a second stage in, the second stage itself and a set of cans. The cans were easy since the diameter of the main body of the Olympic was the same as the Voit so the same cans that were used on the Pegasus would work on the Dacor. I took some measurements, clamped a body into the mill and drilled away…not the best approach in retrospect. On my first attempt to create a LP port I miss judged the depth of my cut and preceded to bore all the way through the body making it useless but not to destroy the reg in vain, I sawed it in half so I could better see what I was dealing with, turns out there is room but not much. The hole in the upper corners of the reg cut in half were my first attempt at a port.
With a better idea of the space I had to deal with, I decided to make a regulator mock up to experiment on before risking the life of another reg, a scrap piece of aluminum with the necessary holes drilled, bored and tapped became my test jig. For initial testing I connected it to my air compressor so I would have an unlimited supply of air to work with. I was not going to be breathing off of it during the initial testing and it could be easily washed before actual breathing test so shop compressor air was not a problem to use. After some measurements to determine how much space I had to work with and doing my first design for the LP seat I machined the port into the aluminum block and turned a LP seat from brass. It became apparent that screwing the second stage into the reg like is done on both the Voits and US Divers regs was not going to work, there was not enough depth to install a LP seat and the second stage so an alternative way of mounting the stage was needed. As it turned out, the alternative mounting had the extra benefit. Because the second stage body had to be a good bit larger to provide space for the mounting screws, it allow me to move my venturi port much closer to the can horn and to add some venturi controls. This made a very effective and controllable venturi.
With the test jig completed and the LP seat installed, it was time to move to the second stage itself. I decided to make as much of it as I could, after all,one of the big reasons I did this was just to prove to myself I could. Besides hardware, the only part of the second stage I did not make was the lever, it was borrowed from the HPR, another project I had been involved with. The second stage consists of 3 major parts, the main body, the body bushing and the LP seat holder. I chose delrin for the main body for a couple of reasons. It’s tough, very easy to machine and not as expensive as brass, besides I like machining delrin. The body bushing is made of brass and serves as reinforcement to the delrin but it’s main purpose was to be a simple piece I could make quickly and/or adjust easily. I don’t claim to be a math or mechanical genius so trial and error are more my mode of operation. I knew that I was going to have to play with the dimensions in the spring chamber to get the correct spring tension for the proper cracking pressure. Unlike a nozzle that is screwed in, I had no way of adjusting spring tension on the fly so I had to design in a part that I could trim as needed. The bushing allowed me to quickly remove it and remove material until I got the spring tension right.
The next feature of the second stage is it’s adjustable venturi. Again, calculating the needed flow and orifice sizes is not my strong suit so I opted for a more mechanical approach, an adjustable flow, besides, I wanted a way to vary the venturi response. I prefer a stronger venturi but others don’t so I made a simple way to control the flow. The screw in the side of the body is turned to control the flow.
Once I had the port design, LP orifice design and the second stage completed, it was time to move on to machining the main body. The port had to be drilled, an air passage had to be drilled from the IP chamber to the new second stage port, the necessary counter bores had to be machined and the port threaded to accept the LP seat. This was the most difficult part of the job because one mistake here and the entire reg became scrap….like the first one. The test jig helped here as well since I had already performed the same machining operations on it. The item on the right is an installation tool for the LP seat. If you look closely at the LP seat in some of the photos you will see it has 2 flats that allow the installation tool to be used.
Once the port was completed and the second stage built it was time to install the reg into a new set of cans. I chose to use Robs reproduction cans, both because they are easy to machine and I have a hard time destroying old cans, Rob can always make more repros but more original cans are not going to be made. The body ring was made by cutting excess material off the end cap of the 400 and adding slots for a ring tool. The addition of a HPR lever with a new upgraded diaphragm and the reg was ready to test. The second stage proved to work nicely. If flows plenty of air, the venturi can be adjusted from none to overly aggressive and the cracking pressure is close to 0.5 IWC. I liked the way it looks as well.
Finally, the reg need to be dressed up to go diving. I added a Dacor Pacer XL second stage, a Dacor SPG, a set Voit gray hoses and black mouthpiece from the Scuba Museum. The finishing touch was the really nice label that Doc Ed and Allan produced for me.
The reg has been pool tested and it worked very well....some open water students got to see the first bubbles come from this new reg. It will make it's open water debute at Sand Dog next weekend (for those of you who do not know, Sand Dog is an annual meeting of vintage divers hosted by Vintage Double Hose). This was a fun project to do. Thanks to Luis, Allan and Ed for assisting me with the project. There are more photos in Photobucket and I can add more is anyone would like to see more of the machining process. Hope you guys like reading about my projects.
")