


SaltyWombat
Contributor
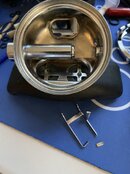
A Dacor regulator was donated to me to tinker with. I broke the second stage lever arm when reinserting it into the barrel and poppet. The service manual says:
and:
I don't have the multi-tool, so I used a wooden dowel instead. I inserted it in the barrel and pressed down to release spring tension. This worked fine when removing the lever, but did not work well when inserting it back on. It was tricky holding the poppet in just the correct position so the lever feet would slide in.
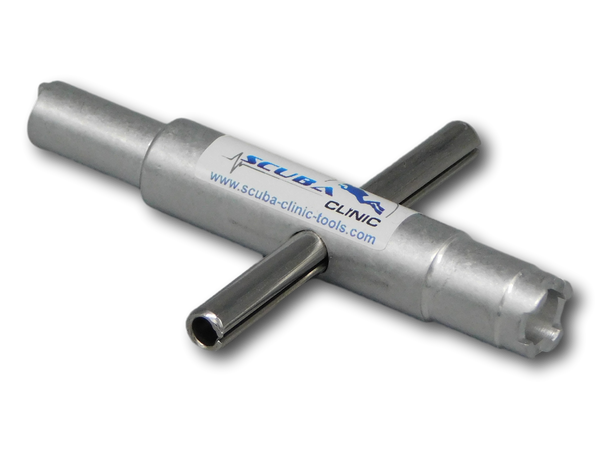
Use multi-tool to depress valve seat carrier. The lever will now be loose. Remove lever by freeing one side at a time from the valve seat carrier housing. Release multi-tool slowly because of the spring tension released by removal of the lever.
and:
Install Venturamatic lever as follows: Hold the bottom box assembly in the palm of the left hand grasping the crossbar of the multi-tool together as far as it will go. With the right hand insert the ends of the lever one at a time into the square broached holes on the side of the carrier chamber. Release the tool. Lever will now be in an up right position.
I don't have the multi-tool, so I used a wooden dowel instead. I inserted it in the barrel and pressed down to release spring tension. This worked fine when removing the lever, but did not work well when inserting it back on. It was tricky holding the poppet in just the correct position so the lever feet would slide in.
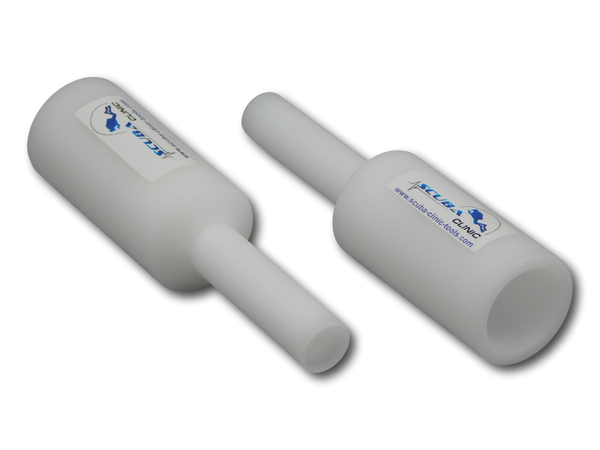
- Does anyone have a Dacor multi-tool they'd be willing to sell me?
- If not, does anyone know what that tool looked like? Perhaps I can imitate it.
")


