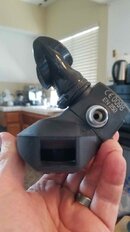
ScubaPro D350 Adjustment (and soon to be overhaul)

Please register or login

Welcome to ScubaBoard, the world's largest scuba diving community. Registration is not required to read the forums, but we encourage you to join. Joining has its benefits and enables you to participate in the discussions.

Benefits of registering include

  • Ability to post and comment on topics and discussions.
  • A Free photo gallery to share your dive photos with the world.
  • You can make this box go away

Joining is quick and easy. Log in or Register now!

aalbert

Registered
Messages
58
Reaction score
46
Location
Miami, FL
# of dives
100 - 199
Background - my sons D350 was sent out for service and adjusted to the lowest factory spec (1.1" - which due to liability etc. is as far as they probably want to go - I get it), but it seemed like some of the performance was missing. On another thread I mentioned this, and it was noted that the unit could be further tuned.

I took rsingler's advice on another thread - Take a pin wrench and unscrew the top cap. Use a small screwdriver to unscrew the adjustment disc in the center of the hole 1/24 turn (2.5 minutes on a clock). Put the disc back on and test on a tank, with the sink test of cracking effort Regulator Inspection and Checklist (Rev-8) Repeat until your stiffness is gone and cracking effort is 1".

So with that in mind, below was the starting point.. At this point the unit could be mouthpiece up, and submerged to past the tie-wrap on the mouth piece.

scubapro_d350_startingpoint-jpg.479185.jpg


I went ahead and tried the 1/24th turn, with little effect. I continued this 4-5 times, and finally for grins, just went what appears to be 110-120 degrees from start, which I figured was enough for now. At present the unit begins to free-flow when the S is exposed, and has better breathing effort.

scubapro_d350_counterclockwise_postadjustment-jpg.479186.jpg


scubapro_d350_watertest_belowthes-jpg.479187.jpg


From the above, have I taken it too far?


Going forward I bought another D350 on eBay (with a Mk10 Plus 1st stage) that I plan on taking apart to learn more about this particular setup, and rebuild, so my son has a spare to fall back on - though with price of rebuild kits for these, I might also just send it in, to get base lined, and then tune it once it comes back.
 
I put a $30 limit price for my first D350 rebuild kit, good thing I am not in a hurry.

Do you have the D400 repair guide?
 
If your reg freeflows at the level of the S in your photograph, that's about 0.5"-0.7" above the level of the diaphragm. That is the best performance you can expect from a D-series, and is a testament to the quality of the knife edge on your orifice! Nice work.

Is it too low a cracking effort?
Well, that depends. The nice thing about the D-series is that the coaxial diaphragm and exhaust valve make for very little performance change in any diving position. So I have dived D's at 0.6" and had them be very stable.
There are a couple of risks, however.
First is that as the poppet seat "takes a set," the little groove created by the orifice knife edge is the physical equivalent of unscrewing the adjuster just a bit more. What I'm saying is that in a few months, your reg may begin to freeflow. Of course, now you know what to do: just screw it back in a little.
Second however, is the consequence of unidirectional spring adjustment. Unscrewing counterclockwise is "against the grain" of the spring. In a frictionless system, it wouldn't matter. But if you have made adjustment after adjustment CCW only, the windings of the spring may actually be under a little tension. If the base of the spring has caught microscopically on any part of the adjuster cap or the poppet, when it "uncatches" you may again see a little less tension on the poppet, and the reg may suddenly freeflow. The cure is as before: tighten it back up a little. That's why D-series adjustments are typically made by unscrewing a little past where you want to end up, and then screwing back in a hair to detension the coils. Sorry I didn't mention that before.

Bottom line?
You've shown just how magical the D-series is! A cracking effort of 0.6" is unattainable by almost any other reg (the Micron and Poseidon Cyklon are two exceptions), but will remain stable in any position.

One caveat to going this far below manufacturer spec: breath control. It is possible with this low cracking effort to begin a breath and almost forget to turn the valve off. It's hard to describe what I mean, but I noticed it one summer diving Anacapa Island in SoCal. I had tuned my D to 0.6", and found that when I didn't pay attention, I'd allow a tiny stream of bubbles to continue out the exhaust when I rotated 90 degrees left or right to look under a ledge. In that position, the top edge of the exhaust valve is just about a half inch above the center of the diaphragm. When I started an inhale, and didn't deliberately exhale with the same degree of effort, the valve would stay open. In other words, those low efforts demand deliberate breath cycles to not only turn the valve on, but to close it as well. A minor issue, though.

One final point: unlike second stages of conventional case shape, the diaphragm of the D sits at an angle other than 90 degrees to the mouthpiece. So when you are measuring diaphragm depth below the surface of the water in your sink, the diaphragm needs to be parallel to the water. That would put the mouthpiece tilted slightly back from vertical. The diaphragm position is at about the top edge of the exhaust hole. So that's zero. The "S" on the back of the rubber case is at about 0.7", and the lower lip of the mouthpiece hole is at 1.7" to 2.1" depending upon mouthpiece design. So 1" spec cracking effort is with the diaphragm horizontal, and the water in the sink just at the very top lip of the back of the rubber case, where it meets the plastic regulator body.
20180927_152818.jpg

Disclaimer: this is not a recommendation to deliberately tune below manufacturer specification. Some of us do, and seem to like it, that's all. Low efforts do increase the risk of regulator freeflow.
 
Thank you for your great insight and real world descriptions of how it all interrelates - it gives a lot better understanding than reading through manuals etc.

I was supposed to take the regulator out for a test drive, but the weather looked like crap when we went to pick up the boat, so we called it off (which of course an hour later it became a beautiful day). Will give it another run in the sink in the interim, and see if anything changed after bouncing around the in back of the car/dive bag for a day, and maybe unscrew a little more/screw back in to be sure.

My spare D350 showed up Friday.. Not as pristine as my first one (the MK10+ that it was attached to had corrosion inside and out, so once rebuilt it will probably be left to serve a beater regulator I keep on the boat), but so far without taking it apart I don't note a lot of corrosion... Case looks a little more weather/UV worn, but is decent overall.... Will tear into it once I clear out some other projects - might setup the photo lights to get a little better chronicle of the condition and process (and thank you to Kupu for the D400 manual).

Below - Spare D350
scubaPro_D350_Spare_AsReceived.jpg


Below - Mk10 Plus that was originally paired with the D350 above
scubapro_mk10_plus_asReceived.jpg
 
Added 2 D400s to the collection.. Here is a pic of my spares / etc.. Have had the Air1 for 20+ years now... My son's D350 is not pictured.

Looks like I will have some education days ahead of me, learning about these beasts.

scubapro_d-series_air1.jpg
 
Purchased a D400 earlier this week from board member @tridanca .. Off the bat I noticed that it had a big rattle / clunking noise inside from what appeared to be the lever (noise went away when depressing purge)... Hooked it up for grins to see how it behaved, and the breathing performance was like using a 4' snorkel.

Went ahead and soaked the unit in hot/soapy water for 20 minutes to loosen up the purge cover, and at that point it came off pretty easily... As suspected when I removed the diaphragm the lever had a lot of play between the two. Went ahead and stripped the rest of it down.. Insides were pretty clean, and all it took to shine it up was a few minutes with a toothbrush and vinegar. Rebuild kit I had didn't include any of the traditional o-rings for things like the top cap, valve body, and air inlet, so I attempted to match them up with my O-ring collection.. With that in mind it appears that the o-rings that I selected for the valve body aren't exactly the right size, or possibly hardness, as there seems to be a little movement (it definately pops in and out easily), and there is a leak that I attribute to the interface of that and the air inlet.

I did a practice assembly with the old poppet, to see how everything interfaced.. Adjusted the nyloc screw in a few more turns than it was previously set to, which resulted in better performance (since the diaphragm wasn't having to be sucked in 1/8" or more to hit the lever - as an aside my metric hex keys, 2mm and 2.5mm didn't fit it, but a standard size did. Was having a leak (which I now attribute to the o-rings on the valve body) so decided to go with the real poppet - which required a readjustment of the nyloc stud. At this point I need to figure out the correct o-ring, and if it is correct, then find.,, out what is really causing the leak.

Being new to the D series, and noting that there isn't a lot of info about these out there, I decided to take a bunch of pics as it came apart to better let myself and others understand how it works. If I make an erroneous statement about how something appears to work, let me know so I can correct it for others.


Purge cover removed after a little bath in warm/soapy water
d400_rebuild_coveroff_warmwater.jpg


Lever is slotted into the diaphragm
d400_rebuild_diaphragm_hook.jpg


Pre-Dive switch engaged, which pushes forward on the lever and adding more resistance to the inhalation effort.
d400_PreDiveLever_Engaged.jpg


Alternate view of Pre-Dive spring engaged
d400_rebuild_lever.jpg


In dive mode, the spring pulls away from the lever, and allows for unimpeded operation
d400_PreDiveLever_retracted.jpg


Top View
d400_rebuild_topview.jpg


Aspirator cap removed from the main body
d400_rebuild_aspiratorCap_removed.jpg


Poppet removed
d400_rebuild_poppet_removed.jpg


Valve body orifice.. Might be a little rough, but not sure if there is a easy way to smooth it out...
d400_rebuild_ValveBody_Orifice.jpg


Field stripped D400
d400_rebuild_field_stripped.jpg


Valve body o-rings ... they seem to match up, but I have leaking that can be tweaked by applying pressure to the top of the body, etc... Either size or hardness is off.
d400_rebuild_o-ring_valvebody.jpg


Body cap appears to be a 023
d400_rebuild_o-ring_BodyCap.jpg


Air inlet cover matches up to 015 nicely
d400_rebuild_o-ring_AirTubeCap.jpg


Poppet shaft - not sure what conventional size this would be - suggestions ?
d400_rebuild_o-ring_PoppetShaft.jpg
 
Re: your valve body oring issue, see this thread:
D400 Service Tricks - one solution begets a new problem
PM me if you have questions or need parts. D-series is a love of mine and @couv. I'll send you an annotated diagram with lots of hints. I see you already have a service manual. Also Regulator Savvy (www.scubatools.com) has a chapter almost completely devoted to the theory of this design.
 
Regarding replacement for oring 01-050-323. Are these correct size?

(Edited to remove links to wrong oring)
 

Back
Top Bottom