About four months ago, I posted a thread on How to restore a Piston Regulator that has IP creep . In probably excessive detail, we walked through how to restore a piston regulator with a blunt-end piston. Most newer pistons have switched from knife-edge pistons to blunt pistons with a cone seat. They’ve proved more reliable at sealing, and less prone to damage.
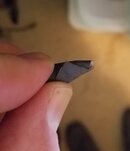
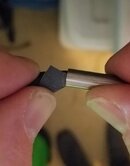
But for those of you that love vintage gear like a Mk 5,
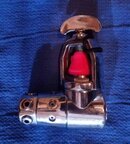
a Mk 7 “honker”
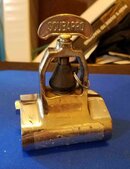
or an original Mk 10,
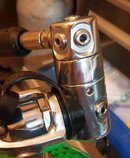
you’ll need to be able to restore a knife edge piston.

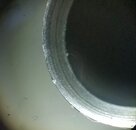
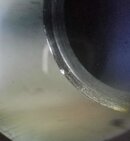
Unlike the rounded edge of a blunt end piston like a Mk10+, a Mk20 or a Mk25, the knife edge piston seals with a sharp edge that digs into the seat.

There’s no need to go through all the detail of that first thread again here. Since these are likely vintage regs, the high pressure piston shaft oring is captured deep in the bore of the reg body. So perhaps take a peek at the thread How to use a Double Hook Pick to assist you with disassembly. Otherwise, the same concepts of evaluating IP creep, parts cleaning and reassembly apply.
But let’s take a look at the unique feature of these regs: the knife-edge piston. It originally sealed against a flat seat, and the match had to be perfect. In fact, you can use the new cone seats that were introduced for these regs later, and we’ll take a look at why. But the biggest factors that cause leaks in these old regs are scratches on the shaft of the piston (where HP air slowly leaks out the ambient chamber holes, as can be demonstrated when the reg is submerged), or nicks in the knife edge itself (causing IP creep). Both occur from technician mishandling. The shaft can be scored against the bore of the regulator body if a piston is removed or inserted in anything but a perfectly straight direction. And the knife edge is susceptible to a host of ills: clanking against other metal parts in the ultrasonic cleaner, falling over on a metal workbench, being dropped or even (!!) being pushed out of the regulator with a screwdriver.
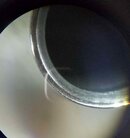
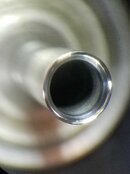
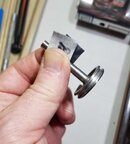
Here’s an original Mk5/Mk7 piston with a deep nick right on the knife edge:

It’s no surprise that there was significant IP creep and resultant freeflow from the second stage.
How do we fix it?
Well, you can’t just sand it flat. A knife edge piston works against a flat seat because there is sufficient force to indent the plastic of the seat with the metal of the piston. That requires a knife edge because of the firmness of the HP seat needed to withstand tank pressure, not just intermediate pressure.
Here’s some math, and if you want, just skip this section.
Assume the Intermediate Pressure (IP) is 130 pounds per square inch. The diameter of the Mk5 piston head is about 1 1/4". Using our high school math formula for area (πr2), with a piston head area of about 1.22 sq in, that means that there are about 166 pounds pushing on that shaft, and it’s all concentrated on the thin knife edge. It’s enough to dig into the plastic and create a seal. What is the area of that knife edge? If you examine the depression in an old seat, you’ll see a thin ring maybe 2/100’s of an inch wide. 166 pounds concentrated on that little line is equivalent to thousands of pounds per square inch of contact area. No wonder it seals!
Now if you grind the piston knife edge flat, you increase the contact area by 2-10 times, depending upon how much of the knife edge you convert to a dull flat. This substantially reduces the pounds per square inch that the piston places on any given portion of the HP seat, with the result that it can no longer withstand the adjacent 2,000-3,000 pounds per square inch of tank pressure, and IP creep results.
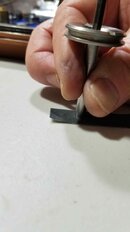
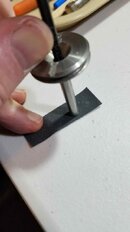
The way to attempt to maintain the knife edge is to carve out (slowly sand out) metal from the inside of the piston shaft in the same angle originally machined, until the nick disappears.
Depending upon the size of the nick, it can be a tedious process, removing all that metal:
Here’s a schematic knife edge piston shaft end, in cross-section and side views.

Here’s a nick, same views:

And here’s what we have to accomplish:

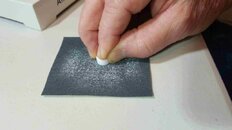
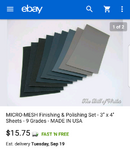
The key to the process is a product called Micromesh.
Essentially cloth backed Wet-Or-Dry sandpaper, it comes in grits from 1,200 to 12,000.
For our purposes, 2,400 to 8,000 will suffice.
See next post...
But for those of you that love vintage gear like a Mk 5,

a Mk 7 “honker”

or an original Mk 10,

you’ll need to be able to restore a knife edge piston.
Unlike the rounded edge of a blunt end piston like a Mk10+, a Mk20 or a Mk25, the knife edge piston seals with a sharp edge that digs into the seat.
There’s no need to go through all the detail of that first thread again here. Since these are likely vintage regs, the high pressure piston shaft oring is captured deep in the bore of the reg body. So perhaps take a peek at the thread How to use a Double Hook Pick to assist you with disassembly. Otherwise, the same concepts of evaluating IP creep, parts cleaning and reassembly apply.
But let’s take a look at the unique feature of these regs: the knife-edge piston. It originally sealed against a flat seat, and the match had to be perfect. In fact, you can use the new cone seats that were introduced for these regs later, and we’ll take a look at why. But the biggest factors that cause leaks in these old regs are scratches on the shaft of the piston (where HP air slowly leaks out the ambient chamber holes, as can be demonstrated when the reg is submerged), or nicks in the knife edge itself (causing IP creep). Both occur from technician mishandling. The shaft can be scored against the bore of the regulator body if a piston is removed or inserted in anything but a perfectly straight direction. And the knife edge is susceptible to a host of ills: clanking against other metal parts in the ultrasonic cleaner, falling over on a metal workbench, being dropped or even (!!) being pushed out of the regulator with a screwdriver.
Here’s an original Mk5/Mk7 piston with a deep nick right on the knife edge:
It’s no surprise that there was significant IP creep and resultant freeflow from the second stage.
How do we fix it?
Well, you can’t just sand it flat. A knife edge piston works against a flat seat because there is sufficient force to indent the plastic of the seat with the metal of the piston. That requires a knife edge because of the firmness of the HP seat needed to withstand tank pressure, not just intermediate pressure.
Here’s some math, and if you want, just skip this section.
Assume the Intermediate Pressure (IP) is 130 pounds per square inch. The diameter of the Mk5 piston head is about 1 1/4". Using our high school math formula for area (πr2), with a piston head area of about 1.22 sq in, that means that there are about 166 pounds pushing on that shaft, and it’s all concentrated on the thin knife edge. It’s enough to dig into the plastic and create a seal. What is the area of that knife edge? If you examine the depression in an old seat, you’ll see a thin ring maybe 2/100’s of an inch wide. 166 pounds concentrated on that little line is equivalent to thousands of pounds per square inch of contact area. No wonder it seals!
Now if you grind the piston knife edge flat, you increase the contact area by 2-10 times, depending upon how much of the knife edge you convert to a dull flat. This substantially reduces the pounds per square inch that the piston places on any given portion of the HP seat, with the result that it can no longer withstand the adjacent 2,000-3,000 pounds per square inch of tank pressure, and IP creep results.
The way to attempt to maintain the knife edge is to carve out (slowly sand out) metal from the inside of the piston shaft in the same angle originally machined, until the nick disappears.
Depending upon the size of the nick, it can be a tedious process, removing all that metal:
Here’s a schematic knife edge piston shaft end, in cross-section and side views.
Here’s a nick, same views:
And here’s what we have to accomplish:
The key to the process is a product called Micromesh.
Essentially cloth backed Wet-Or-Dry sandpaper, it comes in grits from 1,200 to 12,000.
For our purposes, 2,400 to 8,000 will suffice.

See next post...


