Tank Equalizer for $2.50

Please register or login

Welcome to ScubaBoard, the world's largest scuba diving community. Registration is not required to read the forums, but we encourage you to join. Joining has its benefits and enables you to participate in the discussions.

Benefits of registering include

  • Ability to post and comment on topics and discussions.
  • A Free photo gallery to share your dive photos with the world.
  • You can make this box go away

Joining is quick and easy. Log in or Register now!

OK, OK, Dr. Hill, Herman, and the rest of you. I assumed too much in post #1 of this thread. Give me an F, but forgive me just a little as this is the DIY section. The intent of this post was to address the most common reasons one would want to transfer just a few cubic feet of air from one bottle to another. Mainly I had in mind the typical cases where you need to avoid the VIP Nazis. One example would be if you travel with a pony bottle on an airline and have to remove the valve; another case would be if you want to remove the valve from a tank to have a peek inside or perhaps just to install a different valve. Some people want to top up there pony every now and then without having to pay for an entire fill. I'm sure there are as many examples as there are tank monkeys with reasons not to fill an empty tank.

You assumed just fine, except years too early for me... and I bought a trans fill hose and like it in principle, except it's just ridiculous for travel... Just as "Prof. Couv" assumed... So, it should be people like me that get the "F" grade...

So, a related question (just ordered the fitting did not try yet):
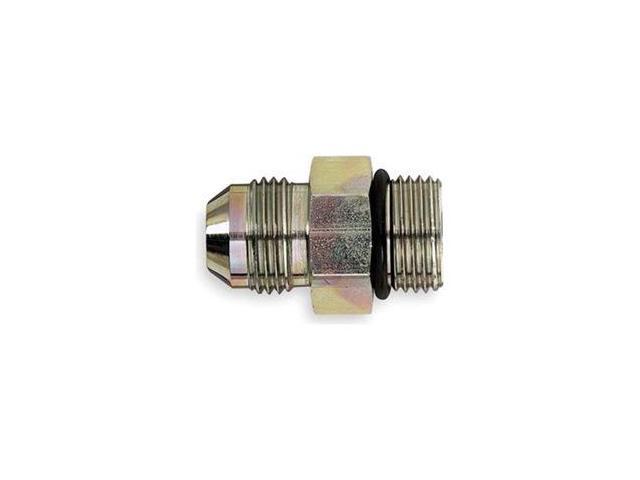
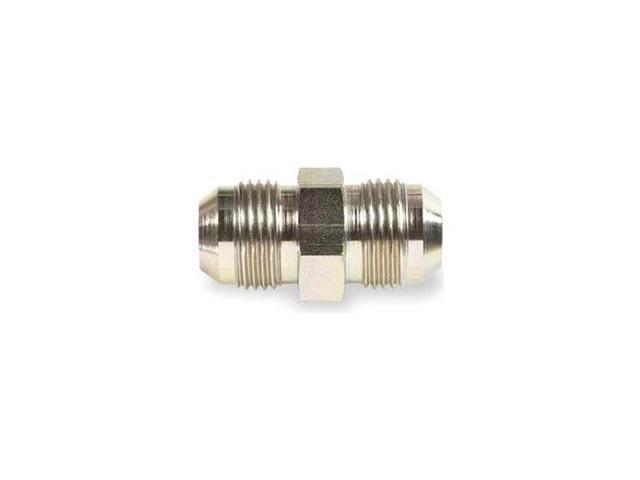
It's a plated (zinc presumably) carbon steel fitting. When not in use, how do you keep that sort of thing (or my cheap black Allen keys for that matter) when travelling to salty destinations? The hex keys or other tools could go into some sort of a no-rust bag, but probably not something meant for breathing gas.
Just keep it as is, rinse after a trip and replace when rust spots show up ... or keep it in the save a dive kit or travel kit ... stored / packaged how to prevent (not promote as sealing in salty moisture would) rusting?
 
Hi Schwob,

My fittings came with plastic caps on each end. I use them to keep the inside of the fitting clean, and the threads protected. If your fittings don't come with caps, I see no reason not to just put them in a zip lock bag. Clean the fittings with hot water and liquid dish soap, dry and coat with a film of oxygen safe lube (Krytox, Christolube, Tribolube, etc) to help prevent corrosion.

I do the same with my cheap allen keys and other tools.
 
It's a dab of lube rubbed in for mine too.

20180804_175238-01-02.jpeg
 
Thanks for this. I recently got out of local diving and sold my good tanks. But I still have an old steel 72 sitting around which is getting close to empty. Having a tank with a few hundred PSI in it is going to be very useful for making sure a reg set is assembled properly, etc. I'm the perfect audience for this cheap hack.
 
@couv do you add an o-ring on the flare fitting side?
Is there a reason for using the JIC flare fitting, or is the flare irrelevant and just happens to be something commercially available with 7/16"-20 threads? (The image links in the first post are dead, so I can't see if there is just one connector or if there are two connected by tubing; but I'm guessing just one.)

I noticed that the original Grainger link no longer works (not a 7/16"-20 thread). That's discussed later in the thread (Tank to tank fill? ) but I was trigger happy and ordered something else before reading down that far:

McMaster-Carr for $8
Connection UN/UNF (SAE) Male
Thread Size 7/16"-20
Maximum Pressure 6,000 psi @ 72° F
Material Galvanized Steel
Gasket Material Buna-N Rubber

I noticed it was steel rather than brass and wasn't sure if that mattered so I also threw one of these $3 brass parts into the order:

Connection Style Flared
Flared Angle 37°
Thread Type UN/UNF (Tube End)
Thread Size 7/16"-20
For Tube OD 1/4"
Material 360 Brass
Maximum Pressure 3,200 psi @ 72° F
with flared connections on both ends. The 3200 psi max pressure seems ok for my purposes. (A 3300 psi version was also available.)

I later read down far enough to find Tank Equalizer for $2.50 discussing dealing with steel corrosion.


So my question is: is there a reason to prefer the Eaton SAE-JIC adapter discussed earlier in the thread over the SAE-SAE part I bought last night?


Separately, is it correct to assume this setup is fine up to 40% O2? The high-O2 transfill whips I've seen online (Fill Whip Kit ) seem to come with needle valves, though it's unclear if that's just for more precise flow control or also for safety (e.g. less dramatic air flow changes reducing ignition risk). I have no intention of actually transfilling high-O2 gases, but I'm curious as an academic matter what concerns might arise if that were being done.
 
@couv do you add an o-ring on the flare fitting side?
Wow, this thread is still alive and to the best of my knowledge no one has been killed using either of the two methods posted in the OP. So here is a quick review and hopefully a few pictures that still work to make it more understandable.
Please heed these warnings:
Be very careful: You are dealing with high pressure gas. DO NOT INSTALL THE HIGH PRESSURE HOSE INTO A LOW PRESSURE FITTING-DO NOT USE A LOW PRESSURE HOSE.

Thank you @herman for reminding everyone to use some form of pressure relief in the system in case of runaway intermediate pressure.


@Tuba No o-ring is used with the jic to jic connector as that seal is flared metal to metal seal. See Method B below.

A review with pictures of the two methods:
Method A
1. Install one regulator onto the donating tank valve and one regulator onto the receiving tank valve.
2. Remove the submersible pressure gage (SPG) and spool from the hose of the donating tank's regulator.
3. Remove a high pressure port plug or the submersible pressure gage hose of the receiving tank's regulator.
4. Install a hose adapter into the HP port: Male JIC Thread 7/16"-20 to 7/16"-20 JIC
5. Install the donating hose onto the receiving adapter.
6. Make sure all connections are secure and slowly open the tank valves-voila, you are equalizing.
Here is an example of the fitting (Adapter 7/16-20 straight to 7/16-20 JIC)
A060_1_2014091832747460.jpg


Hose Adapter, SAE to JIC, Straight - Newegg.com

Here is a picture of the fitting and hose in use:
147941-2f25f508ad5aaac0bb49e6263c87c4c0.jpg


Method B is the same as Method A except you remove both SPGs and spools from the ends of the donating and receiving regulators and install a different type of fitting (JIC to JIC 7/16"-20) to join the two HP hoses together. (NOTE: Most, but not all high pressure hoses have a female flare on the gauge end of the hoes. Please check to make sure your hose has a flare.)
Here is an example of the fitting.
A060_1_2014091832761947.jpg


The one pictured above is from Eaton, but similar ones are available at McMaster Carr.
McMaster-Carr

@gcarter posted this picture of it in use earlier
img_20180802_202508-jpg.472595


@Tuba Dr. Hill taught me it is never safe to assume anything. Your question about oxygen use in whatever percentages probably warrants a separate thread where people smarter than me can better advise you.

Cheers,

Couv
 
How clean is hydraulic hose? Any chance of dumping a load of hydrocarbons into the tank that was at lower pressure?

Also equalizing pressure through a HP hose is going to take a while. 10-20 minutes??
My thought is more like hours to transfill through the teeny tiny orifice on a HP SPG hose.
 
https://www.shearwater.com/products/swift/

Back
Top Bottom